I've been busy with orders and life in general lately. I'm sorry I haven't updated much! I have plenty of voluteers for my previous post, and I will get working on that project soon! I promise! I will let you know if you've been chosen, it just might be a couple weeks or so. My first priority is my family, my grandmother had a massive stroke a few days ago and is in Hospice right now. I got to go see her this past weekend and we are praying that she can go to Heaven soon and be at peace. She lives out of state, so when I need to leave again I might put my Etsy shop inactive or just put a notice in my shop to let you all know that shipments and communications may be delayed slightly.
Anyway, I have so much to update with my plans for Punky N Munky. Keep an eye out!!

Monday, June 30, 2008
Friday, June 6, 2008
I need some volunteers
I need some volunteers to try something new that I want to do. I'd like to send some various people a few samples, try them out, then answer a few questions via email. I'd like to send them to a couple readers of my blog for some feedback. If you are interested, please either comment here or send me an email at punkynmunky@gmail.com. Either way, in the message, please let me know
1. what your favorite colors are
2. age of the wearer: adult, teen, child, toddler, or infant (please include all potential hair clip wearers in your family)
3. hair type for each person: fine, medium, or coarse in texture. And thin, medium, or thick in density.
4. a way to contact you if you are chosen.
Everyone is welcome to volunteer, however I can only offer this to readers in the USA this time. I will select the recipients based on the answers and try to get a variety of different hair types. Thank you!!!
and the winner is....


Tanya!!!! Congratulations! Tanya is the winner of the cupcake clippies from the birhtday giveaway!
The clips are on their way!
Wednesday, June 4, 2008
Rapunzel

Here is my latest Ribbon Sculpture. I'd been wanting to make this one for a long time now. Finally got the motivation to do it :) She was inspired by Punky who wants to grow her hair long long long, just like Rapunzel.
Monday, June 2, 2008
How to make a twirl skirt
I made up this tutoral a couple years ago. I did not understand my camera so well then so the pics aren't the best and there aren't enough, but if you have some sewing knowledge, even a beginner should be able to do it, I was just starting out when I made it (I had some help from another sewer who talked me through it)! I was planning on redoing it, but never got around to it. I had promised one, so until I get to redo it, here it is!
Twirl Skirt
Here are the directions that I wrote up for making a twirl skirt. You can make these skirts any size, any length based on these directions.
*Measure your child’s waist. Example 20"
*Decide how long you'd like the skirt to be: 15"
*Decide how many tiers you would like: 3
*Divide your length by the tiers and add seam allowances:
15 divided by 3 = 5.
Example:
If using 5/8 seam allowance, add seam allowances of 5/8" remembering that the top piece you will need to add enough to allow for a casing for the elastic size you choose + the 5/8", so 5+ 5/8 + 1"= 6 and 5/8". On the middle piece it will be 5/8" on both top and bottom so you add 1 1/4". On the bottom, allow for whatever hem you like to do, I like to add 5/8" and do a narrow hem, so I've added 1 1/4.
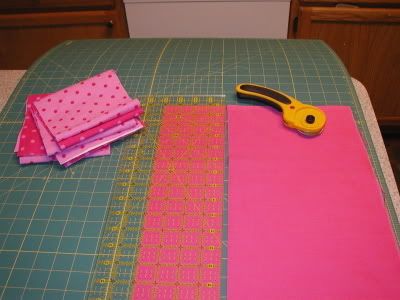
*You will be cutting and/or piecing fabric into strips that are 1 1/2-2 times the width of the strip above it.
Example:
Waist size 20", top tier is 30-40" wide
Middle tier is 45-80"
Bottom tier is 67-120"
I usually round up my numbers depending on the fabric. You can add seam allowance to this too.
The cut strips
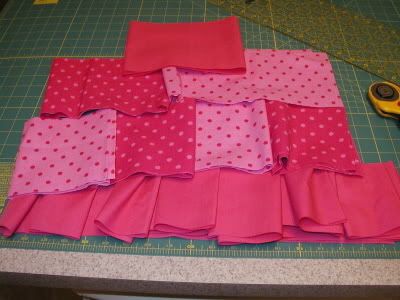
*I usually make the skirt starting at the bottom/longest strip. It seems to be easier than starting at the top. Sew the strip ends together right sides together. remember to press your seams. Mark the quarter marks to help ensure even gathering.
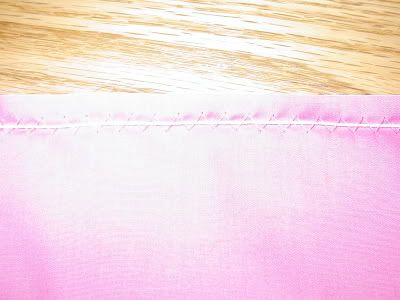
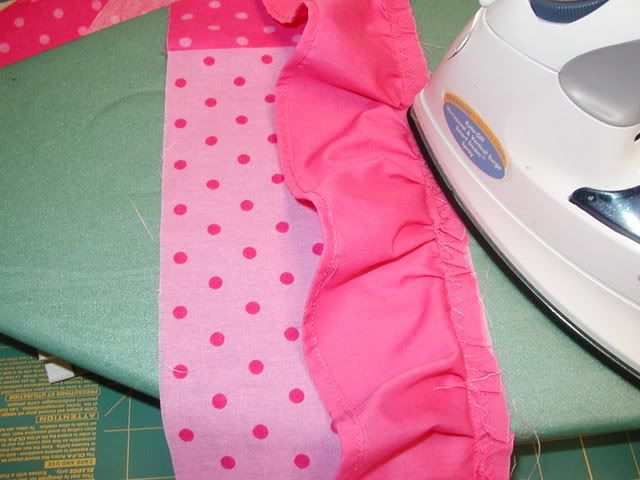
Hem the bottom.
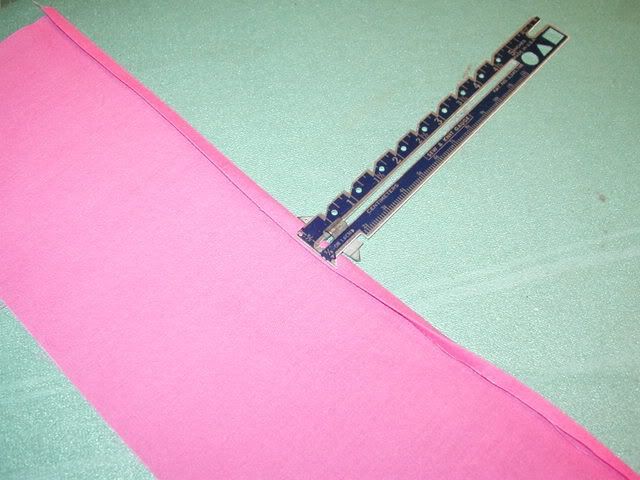
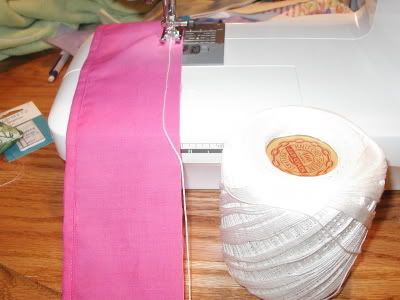
Gather the top edge. I zig zag over fishing line, dental floss, or string to make the gathers. I prefer fishing line, but am using crochet cord so you can see it better. You can also do 2 lines of running stitches to gather, I find that a pain in the butt, but that is just my opinion ;)
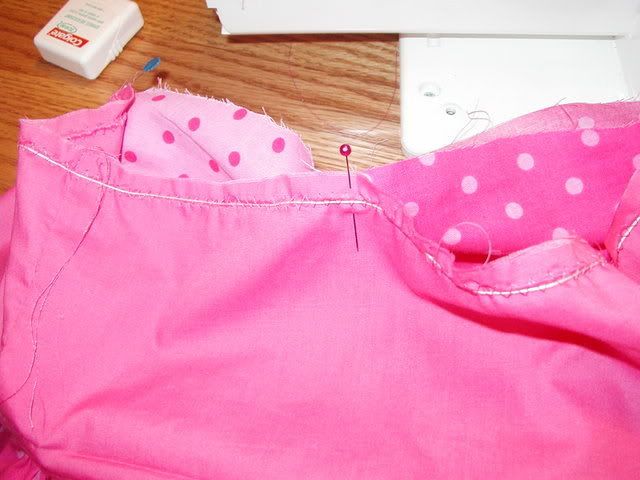
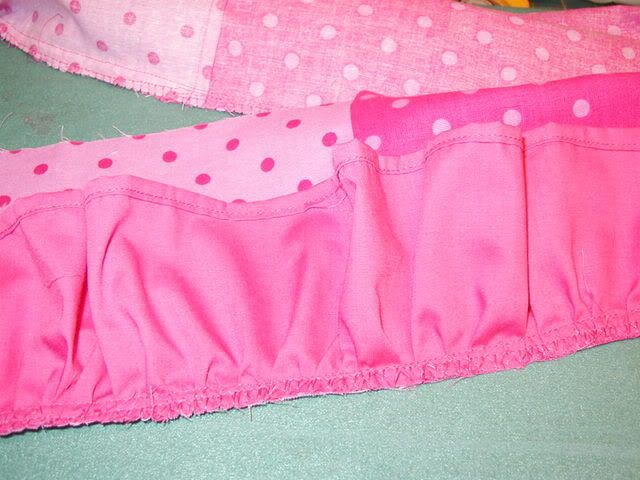
Pin to bottom of next tier right sides together adjusting fullness and matching quarters.
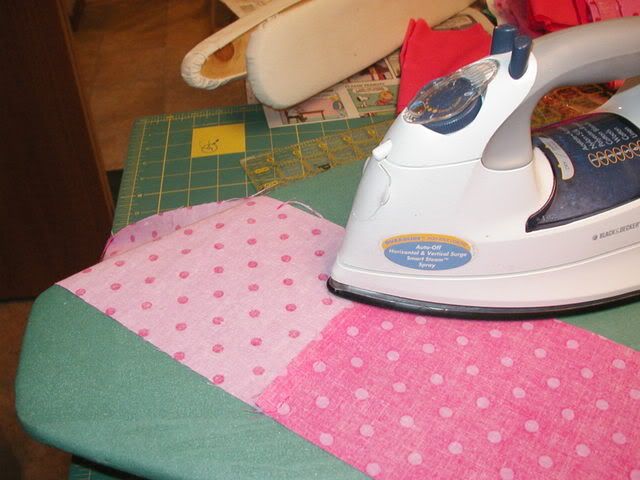
Sew together,
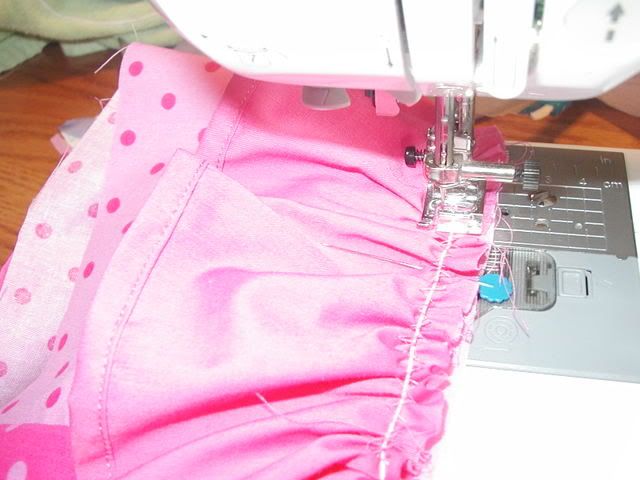
press, trim, and finish your seam if desired. You can also topstitch if you want here.
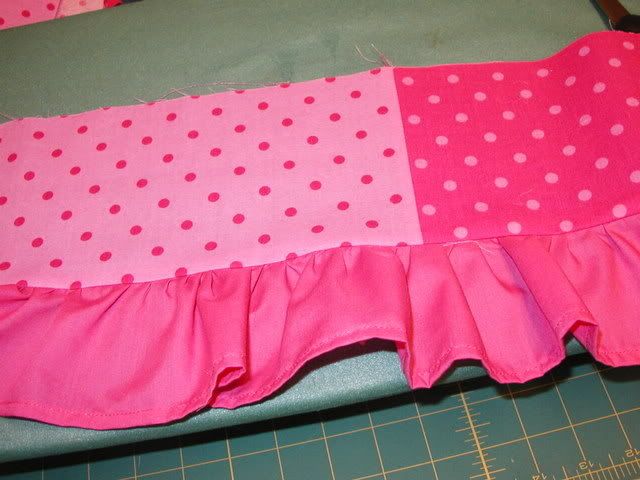
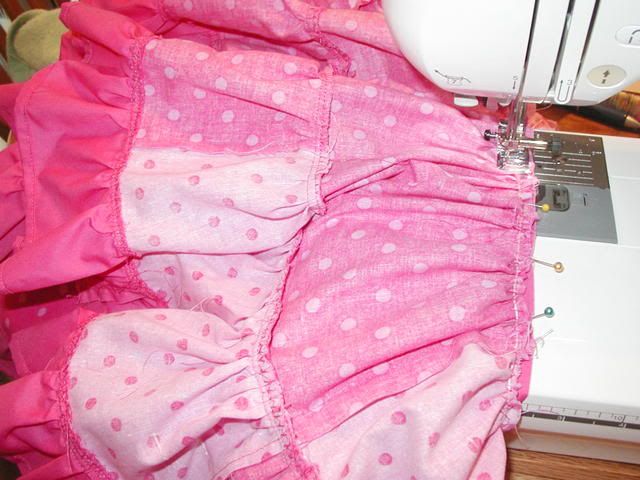
Then repeat the gathering on the top. Matching the raw edges with the next strip and the quarter marks, adjust fullness, and sew.
Once you've sewn on the last strip that is your waist band, it is time to make the casing. Fold over the raw edge, press. Then fold over again leaving enough space for your elastic and edgestitch. Leave an opening to insert the elastic.
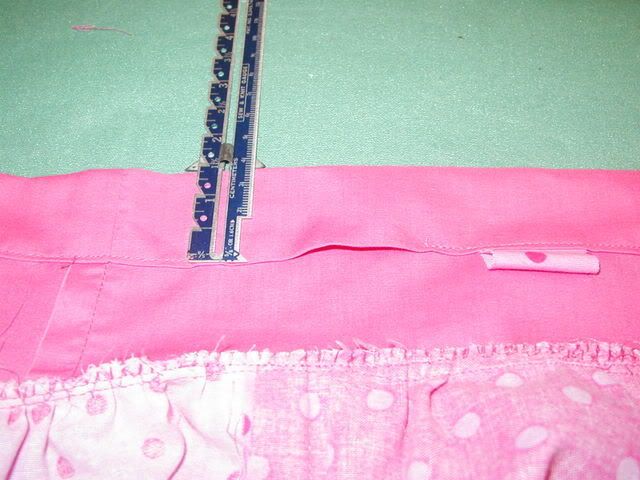
*Cut elastic to fit comfortably around waist, insert into casing sew ends together and close the opening. Adjust fullness on the elastic. Stitch at the sides to keep the fabric from moving around the elastic while worn (stitch in the ditch if you have side seams)
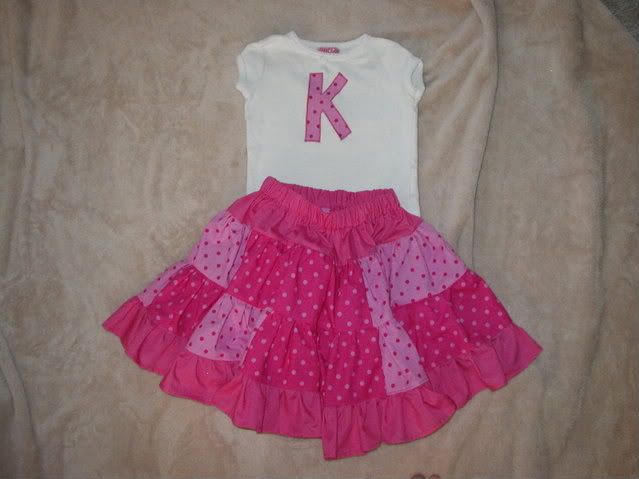
Here it is finished on my daughter (3yo at the time). It wasn't my best one, but she had picked out the fabrics and I made it quickly. Next time I'd cut the squares shorter so it looked more patchwork like.
Here is another one, Punky was about 2.5
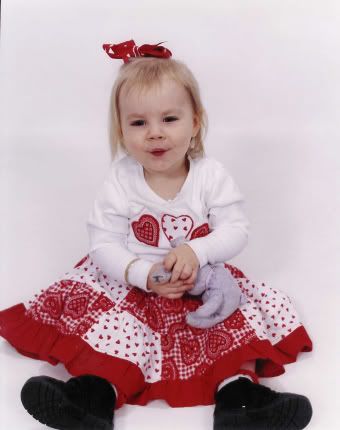
and another for fall. See how you can get creative with the size and lengths of your strips?

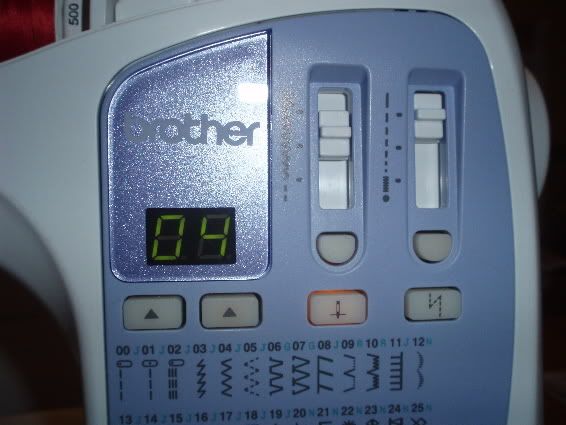
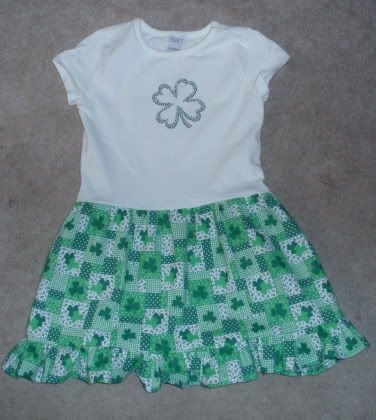
Also, if you want to add it to a tshirt, don't make the casing. Cut your tshirt allowing for the seam allowance. Gather the top of the skirt, match the raw edges and adjust the fullness. Sew using a BALL POINT needle using a stretch stitch. Either a narrow zigzag or if you have it on your machine, it looks like this stitch number 2 on my machine.

Twirl Skirt
Here are the directions that I wrote up for making a twirl skirt. You can make these skirts any size, any length based on these directions.
*Measure your child’s waist. Example 20"
*Decide how long you'd like the skirt to be: 15"
*Decide how many tiers you would like: 3
*Divide your length by the tiers and add seam allowances:
15 divided by 3 = 5.
Example:
If using 5/8 seam allowance, add seam allowances of 5/8" remembering that the top piece you will need to add enough to allow for a casing for the elastic size you choose + the 5/8", so 5+ 5/8 + 1"= 6 and 5/8". On the middle piece it will be 5/8" on both top and bottom so you add 1 1/4". On the bottom, allow for whatever hem you like to do, I like to add 5/8" and do a narrow hem, so I've added 1 1/4.
*You will be cutting and/or piecing fabric into strips that are 1 1/2-2 times the width of the strip above it.
Example:
Waist size 20", top tier is 30-40" wide
Middle tier is 45-80"
Bottom tier is 67-120"
I usually round up my numbers depending on the fabric. You can add seam allowance to this too.
The cut strips
*I usually make the skirt starting at the bottom/longest strip. It seems to be easier than starting at the top. Sew the strip ends together right sides together. remember to press your seams. Mark the quarter marks to help ensure even gathering.
Hem the bottom.
Gather the top edge. I zig zag over fishing line, dental floss, or string to make the gathers. I prefer fishing line, but am using crochet cord so you can see it better. You can also do 2 lines of running stitches to gather, I find that a pain in the butt, but that is just my opinion ;)
Pin to bottom of next tier right sides together adjusting fullness and matching quarters.
Sew together,
press, trim, and finish your seam if desired. You can also topstitch if you want here.
Then repeat the gathering on the top. Matching the raw edges with the next strip and the quarter marks, adjust fullness, and sew.
Once you've sewn on the last strip that is your waist band, it is time to make the casing. Fold over the raw edge, press. Then fold over again leaving enough space for your elastic and edgestitch. Leave an opening to insert the elastic.
*Cut elastic to fit comfortably around waist, insert into casing sew ends together and close the opening. Adjust fullness on the elastic. Stitch at the sides to keep the fabric from moving around the elastic while worn (stitch in the ditch if you have side seams)
Here it is finished on my daughter (3yo at the time). It wasn't my best one, but she had picked out the fabrics and I made it quickly. Next time I'd cut the squares shorter so it looked more patchwork like.
Here is another one, Punky was about 2.5
and another for fall. See how you can get creative with the size and lengths of your strips?
Also, if you want to add it to a tshirt, don't make the casing. Cut your tshirt allowing for the seam allowance. Gather the top of the skirt, match the raw edges and adjust the fullness. Sew using a BALL POINT needle using a stretch stitch. Either a narrow zigzag or if you have it on your machine, it looks like this stitch number 2 on my machine.
Subscribe to:
Posts (Atom)